Thursday, December 24, 2015

Merry Christmas 2015

Wishing all of you a Merry Christmas filled with happiness, love, laughter, and celebrating our Savior who was born on Christmas Day. 


Friday, December 18, 2015

{Oh What Fun} Tag Project Kit

We're sharing all about Christmas tags today over at Stylin' Stampin' INKspiration.

I invited my Card Club over at the end of November for an exclusive "card club only" event where each of them could make 5 tags from the Oh What Fun Tag Project Kit. (They also made 3 cards from another kit...but I will share that another day!) This tag kit is currently on sale for $14.70 (reg. $21). Stamp set is sold separately.

Here's a picture of the set up. Each of the ten tags had their own little bucket which included all of the pieces needed and instructions for each tag.


These are all of the tags when completed. For these tags, I basically just made them as shown in the instructions. It made it easier for my club gals to copy exactly if they wanted to.


I had some leftover tags and it has been so nice having a cute tag to grab when I want to give some goodies to some special people.


Wednesday, December 16, 2015

Wrap it Up!

Just popping in today for a quick look at a fun (and super easy) gift idea for some of my club members. I have a small group of club gals that I meet with regularly at my mother-in-law's home and I wasn't able to see them during December, so I thought it would be fun to give them a little gift...until we meet again in January!

I got this idea from Erica Cerwin at Pink Buckaroo Designs. It's just a fun way to wrap up a package of twine!


  • Cut your DSP 5-1/2" x 3-1/2". Score lengthwise at 1-3/4" and fold over. 
  • Staple once on each side. 
  • Glimmer Paper strip is 5-1/2" x 1/2".
  • I used the Peaceful Pines stamp set with Mossy Meadow Ink. 
  • The large circle is 1-3/4". 
  • Merry Christmas is stamped in Real Red (sentiment comes from Teeny Tiny Wishes). 
  • The sentiment is cut out using the Bitty Banner Framelits.

It's "Anything Goes" at Stylin' Stampin' INKspiration! Come on by for more inkspiration!

Wednesday, December 9, 2015

SSINK Blog Hop ~ Christmas


This month's SSINK Blog Hop theme is Christmas! It will be here before we know it, but I am trying to "just be" this season. I'll let you know how that's going as I get closer! Ha!

As you hop along, please be sure to comment and show some love on every blog! We are always excited to hear from our followers! You should have just left stop number 8 on the Stylin' Stampin' INKspiration Blog Hop - Kim at Stamping with Kim. If so, you are in the right spot. If a link doesn't work or you get off track, you will find the full blog hop lineup below.

With Christmas comes the opportunity to give gift cards (it is definitely more the norm these days!). So, why not make your gift card holders cute?! 

We made these gift card holders at my November card making night. They were a hit! 


How can you resist this adorable Rudolph red nose?

The front part of the card tucks underneath the heart circle...

Open it up and on the inside is a surprise gift card. SO FUN!

Next up is Jennifer at Jenny G Papercrafts. Click on the arrow to head her way!
http://jennygpc.blogspot.com/2015/12/santa-claus-is-coming-to-town.html


Blog Hop Participant List:

  1. Jennifer at Jenny G Paper Crafts
  2. Darcy at Dj's Stampin Place
  3. Diana at Stampin Fun with Diana
  4. Bree at Craft-Somnia Momma
  5. Leanne at Literally My Joy
  6. Laura at Crafty Chicks Creating
  7. Melissa at The Stamp Doc
  8. Kim at Stamping with Kim
  9. Heidi at Stuck on Stampin'

Tuesday, December 1, 2015

White Christmas

It's December 1st! Why not start it off with a Christmas card to help get you in the mood?

This is one of the cards we made at November's card making night. I also used it for my Christmas-themed swap card with my team last week.

Christmas card making is SO MUCH FUN!
                                                                                                              *card inspired by Mindy Backes
Stamp Sets
White Christmas, Oh What Fun
Ink
Early Espresso, Cherry Cobbler, markers - Cherry Cobbler
Paper
Cherry Cobbler, Crumb Cake, Whisper White, Dazzling Diamonds Glimmer Paper
Accessories
SNAIL Adhesive, Stampin’ Dimensionals, White Glitter Ribbon, Season of Cheer Washi Tape, Cherry Cobbler Baker's Twine, 2-Way Glue Pen, Dazzling Diamonds Glitter
 Tools
Big Shot Die-Cutting Machine, Softly Falling Textured Embossing Folder, Scalloped Tag Topper Punch


Friday, November 27, 2015

Christmas Swaps

On Tuesday we held a Stampin' Up! team meeting where we were able to talk "business", share motivation, catch up with what each of us our doing with events, enjoy pumpkin bars, listen to those who went to On Stage a couple of weekends ago, set goals, swap cards, and create a make n take. Ultimately we had the chance to just be together to motivate and support one another in our Stampin' Up! businesses...or as a hobby.

Always a favorite of our time together are the swaps! This time it was Christmas-themed.


We also had the chance to play with stamps with a make n take. My upline shared this awesome technique with us to create this beautiful card. I am SO SAD that Woodland Embossing Folder is retiring. It's a MUST HAVE, so snag it now before it's gone! It will retire January 4th.


Here's an up close to show you we added "glittery snow" to the trees and hill.

Stamping on the inside is always a fun addition.
Plus, it makes it easy just to sign your name and you're done! ;)

The swap card I brought will be posted soon...

...so come on back!

heidiboos.stampinup.net
Click on the banner above to check out all of the items that are 20-50% off -- Punches, Ribbon, Stamp Sets, Washi Tape, Paper Pumpkin kits, Framelits, Thinlits, Boxes, Tags, Embellishments, and so much more!!!
Visit my online store at heidiboos.stampinup.net and click on SHOP NOW.
Be sure to use host code: 9SZJKJC7Also, be sure to un-check the box that says "no contact" so I can send you a thank you for your order! Anyone who orders during the Online Extravaganza will receive a handmade Christmas card.

Don't forget...this makes it easy to shop for Christmas gifts at a great price!

{SALE ENDS MONDAY, NOVEMBER 30TH}

Thursday, November 26, 2015

THANKS!

It's Thanksgiving here in the United States and with this holiday comes a reminder of so many things I am thankful for! At the top of my list are all of YOU ~ those who read my blog on a regular basis, who comment when they can, send me emails or messages, or place orders. It's because of you and your encouragement that I continue to create!!

THANKS! is one small word...but it really does have a big meaning.

Now, I can't take complete credit for the design of this card. I was definitely inspired by a photo I found in the 2015-2016 Annual Catalog. Although I put my own spin on it using a different flower background and adding a little more color...I knew this card was a winner when I first saw it! So simple, but bold. I just love the little pearl accents. It's all about the details!


http://www.stampinup.com/ECWeb/default.aspx
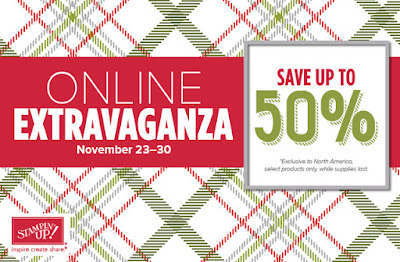
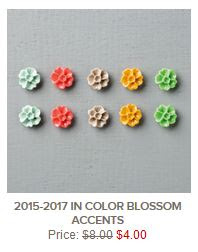
P.S. Don't miss out on these beautiful Blossom Accents! During the Online Extravaganza (ending November 30th), they are 50% off! Click on the picture on the left to visit my online store to see all of the products on sale (heidiboos.stampinup.net)

Stamp Sets
One Big Meaning, Flowering Flourishes
Ink
Black Archival Ink, Sahara Sand
Paper
Whisper White, Cucumber Crush, Watermelon Wonder, Neutrals DSP Stack (Sahara Sand)
Accessories
SNAIL Adhesive, Stampin’ Dimensionals, Mini Glue Dots, Pearls Accents, 2015-2017 In Color Blossom Accents
 Tools
N/A

Monday, November 23, 2015

SSINK Mystery Challenge - Peaceful Pines

It's Monday! That means it's a new challenge over at SSINK! This week it's a "Mystery Challenge". The challenge is to use at least 3 elements in your card or project from the ones listed below. You can even go all out and use all 5 elements if you want! Come and join us and play along!!


I ended up using all of the elements on my card!

1 - Splatter/splotch/splash - the blue background sponged
2 - Use colors Real Red, Pear Pizzazz, and Pool Party
3 - Christmas theme
4 - 3 layers
5 - Use a bow for your embellishment (more of a knotted bow, but that works!)


Stamp Sets
Peaceful Pines, White Christmas (falling snow)
Ink
Pear Pizzazz, Pool Party, Basic Gray
Paper
Pear Pizzazz, Real Red, Whisper White, Red Glimmer Paper
Accessories
SNAIL Adhesive, Stampin’ Dimensionals, Rhinestones, 1/8" Real Red Striped Grosgrain Ribbon
 Tools
Big Shot Die-Cutting Machine, Perfect Pines Framelits, Bitty Star Punch

Online Extravaganza starts TODAY!! 
 http://su-media.s3.amazonaws.com/media/Promotions/NA/2015/11_November/Online%20Extravaganza/Online_Extravaganza_Products_US.pdf

There are even special MONDAY ONLY Doorbuster Savings. Don't wait too long as all items are while supplies last! Click on the banner above to check out all of the items that are 20-50% off -- Punches, Ribbon, Stamp Sets, Washi Tape, Paper Pumpkin kits, Framelits, Thinlits, Boxes, Tags, Embellishments, and so much more!!!

Visit my online store at heidiboos.stampinup.net and click on SHOP NOW.
Be sure to use host code: 9SZJKJC7Also, be sure to un-check the box that says "no contact" so I can send you a thank you for your order! Anyone who orders during the Online Extravaganza will receive a handmade Christmas card.

Don't forget...this makes it easy to shop for Christmas gifts at a great price!

Friday, November 20, 2015

Peaceful Pines Christmas

I have a quick and easy card to share today. It uses the very popular Peaceful Pines stamp set and Perfect Pines Framelits (buy as a bundle and save 15%!)


This is one of the card designs I used earlier in the month for one of my card making nights. It's simple in design, but that red glimmer and the "feathered" tree adds a fun look stepped up look!


Here's the same design, but with a different patterned background and I changed up the sentiment. Both of the sentiment options come in the Peaceful Pines stamp set.


Stamp Sets
Peaceful Pines
Ink
Real Red, Mossy Meadow
Paper
Real Red, Crumb Cake, Mossy Meadow, Whisper White, Red Glimmer Paper, Merry Moments DSP
Accessories
SNAIL Adhesive, Stampin’ Dimensionals, Rhinestones
 Tools
Big Shot Die-Cutting Machine, Perfect Pines Framelits, Bitty Star Punch

We're sharing Christmas cards today at the SSINK blog. Come on by for a visit!
http://ssinkspiration.blogspot.com/2015/11/christmas-cards_12.html

Thursday, November 19, 2015

Control Freaks - It's Beginning to Look a lot like Christmas!


Control Freak Stampers presents "It's beginning to look a lot like Christmas..." Now, I'm not one who likes to skip right over Thanksgiving (I still have all of my Fall decor up), but in the stamping world you kind of have to get a jump start on Christmas fun so you can use all of the great products Stampin' Up! always comes out with! I know many stampers have been playing with Christmas products since the summer. I just started this month, so I'm a bit behind, but I have seen some beautifully crafted paper creations so far using many of the NEW Stampin' Up! products from the 2015 Holiday Catalog. There is even a small little section in the Annual Catalog this year for the holidays!

If you have already been following along on the tour, you should have just arrived from Mary Brown's blog. If so, you're on the right track, so continue on to enjoy some inspiration today!

The two cards I am sharing with you today on the hop kind of have the "snow" theme. I'm really hoping for a snowy winter, but here in the Pacific NW ~ let's face it: it's usually just rain. 

I started with a Thick Whisper White card base and layered it with Smoky Slate cardstock. I added a strip of Silver Glimmer, Holidays Fancy Foil Designer Vellum, and paper from the Season of Cheer DSP. The "merry" was cut out of Silver Glimmer using the Christmas Greetings Thinlits.  I finished off the sentiment with "Christmas" from the Holly Jolly Greetings stamp set. Pair the thinlits together with this set and you can purchase as a bundle for 15% off. They go really perfectly together! The large snowflake (stamped in Lost Lagoon ink) also comes from the Holly Jolly Greetings set. I cut it out using the 2-1/2" Circle Punch and added a beautiful Iced Rhinestone Embellishment for the center. Before popping up the circle on Dimensionals I added some Silver Metallic Thread behind it.


This next card I think is more beautiful in person! Sometimes a photo just doesn't do cards justice. This one is decked out in glitter and shimmer!

I started with a Night of Navy card base. The strip of snowflakes paper on the far left comes from the Season of Cheer DSP. I added a strip of Silver Glimmer Paper on top of that. The winter scene comes from the Happy Scenes stamp set, which is stamped in Night of Navy ink onto Whisper White cardstock and punched out with the 2-1/2" Circle Punch. I added Dazzling Diamonds Glitter using the 2-Way Glue Pen. It sparkles so beautifully in real life! The "Season's Greetings" sentiment also comes from the Happy Scenes stamp set. I simply snipped off the end with Paper Snips to create the banner. I added a Snowflake Element and then tied a bow using Silver Cording Trim and attached with a Mini Glue Dot.


These Snowflake Elements are a favorite for me this year!! 

http://rubberfunatics.blogspot.comThanks so much for stopping by! Next up is Melissa Davies at Rubber Funatics. Keep hopping along to see what she has to share with us...as well as the rest of the Control Freak crew!

Wednesday, November 18, 2015

Happy Scenes - Gratitude

Thanksgiving is drawing closer and with that comes the reminder of all that we are grateful for. Today I am sharing a card of gratitude that we created at one of my card making nights this month. The card design was inspired by Connie Babbert.

**The ribbon is retired, but it just fit perfectly with these cards...and you have to use up your retired ribbon at some point, right?!


{inside greeting - from September's Paper Pumpkin kit}

I ran out of the first sheet of patterned paper, so I improvised with another sheet out of the Into the Woods DSP pack, but decided to add a Mossy Meadow ribbon instead.

 {inside greeting - from Happy Scenes stamp set}

Stamp Sets
Happy Scenes
Ink
Black Archival Ink, Early Espresso, Old Olive (with Blender Pen), markers - Mossy Meadow, Tangelo Twist, Daffodil Delight
Paper
Tangelo Twist, Mossy Meadow, Crumb Cake, Whisper White, Into the Woods DSP
Accessories
SNAIL Adhesive, Stampin’ Dimensionals, {retired} Mossy Meadow 3/8" Stitched Satin Ribbon, {retired} Tangelo Twist 3/8" Stitched Satin Ribbon
 Tools
Big Shot Die-Cutting Machine, Circle Framelits, Woodlands Textured Embossing Folder

If you would like more inspiration for creating cards of gratitude, be sure to stop by the Stylin' Stampin' INKspiration blog!
http://ssinkspiration.blogspot.com/2015/11/a-day-of-gratitude.html

Wednesday, November 11, 2015

SSINK Blog Hop - Mystery Supply Challenge

This month's blog hop theme with the Stylin' Stampin' INKspiration girls is basically anything goes...with a twist! We each were assigned a design team member to send three mystery supply items to. They could be anything we wanted to send as long as they were current items from either the Annual or Holiday Catalog! A surprise envelope would come in the mail for us and we would then use these items to create something! It's such a fun concept and many times we get things that we don't even own and so it's a chance to play with new products! 

As you hop along, please be sure to comment and show some love on every blog! We are always excited to hear from our followers! You should have just left stop number 12 on the Stylin' Stampin' INKspiration Blog Hop - Laura at Crafty Chicks Creating. If so, you are in the right spot. If a link doesn't work or you get off track, you will find the full blog hop lineup below.

My three items arrived in the mail from Jennifer Gregorsky. I didn't own any of the items she sent me, so I was thrilled to be challenged with these new goodies! Thanks for the fun Jenny G! :)

My items included:
  • 5/8" Gold Satin Ribbon
  • Delicate Ornament Thinlits Die (cut out of black glimmer paper)
  • Winter Wonderland Designer Vellum Stack


I added the vellum piece to a Cherry Cobbler card base using Mini Glue Dots. I hid the glue dots (as you can see through on the vellum) with the Gold Satin Ribbon. I decided to make it look like the ornament was hanging from the big bow. The ornament is cut out of Black Glimmer Paper and I attached it to the vellum using glue dots, as well. I wanted an accent piece for the ornament, so I grabbed the Snowflake Wooden Elements (a favorite!) and added a large size Pearl Accent to the middle. I hand cut the banner and stamped Very Merry in Cherry Cobbler ink.


Next up on the hop is Jenn from Happy 2 Scrap 4 Life. Click on the arrow to head her way!

http://happy2scrap4life.blogspot.com/2015/11/mystery-supply-blog-hop.html

Blog Hop Participant List:
  1. Jenn at Happy 2 Scrap 4 Life
  2. Darcy at Dj's Stampin Place
  3. Tobe at The Craft Sea
  4. Donna at Geek Squad Crafting
  5. Carrie at Carrie Stamps
  6. Jennifer at Jenny G Paper Crafts
  7. Tonya at Stampin with Tonya
  8. Kim at Stamping with Kim
  9. Leanne at Literally My Joy
  10. Diana at Stampin' Fun with Diana
  11. Darla at Stampin with Darla & Sisters
  12. Laura at Crafty Chicks Creating
  13. Heidi at Stuck on Stampin'
// ADDED BY RYAN ON 1-3-14 // END ADDED BY RYAN 1-4-14