
The next 12 days on my blog I will be sharing "DIY projects" for my 12 Days of Christmas {projects}. These daily inspiration projects (most of them items I created for my holiday bazaars) will be quick, simple, and practical so that you, too, are able to recreate them during this busy time of the year!
Christmas Project #1
M & M's Skinny Bag with Tag
M & M's Skinny Bag with Tag

Have you seen the adorable new skinny cellophane bags that Stampin' Up! has started selling out of this year's Holiday Mini Catalog? They are 1" x 8" (with adhesive on top) and come in a pack of 50 for only $2.50! They are perfect for so many treats (check out how I used them for Halloween and Thanksgiving).
I added a couple of different tags, like this one with this sweet smiling Santa face!
 This is a single stamp called "From Santa" found in the Holiday Mini (which only goes through January 4th!). He fits perfectly in the 2-3/8" Scallop Circle punch. I decided to punch out the circle with the 1-3/4" Circle punch and then using a Dimensional, attached it to a 2-3/8" Scallop Circle of Real Red cardstock. I added Dazzling Diamonds glitter on the rim and ball of his hat for that extra added sparkle. The ribbon is retired red gingham ribbon.
The other tag I made was similar in size to the one I made with my Thanksgiving M & M treats. This one took a little more work than the Santa above, but how cute would this look on top of a package as the gift tag? I can see it now! Can you?

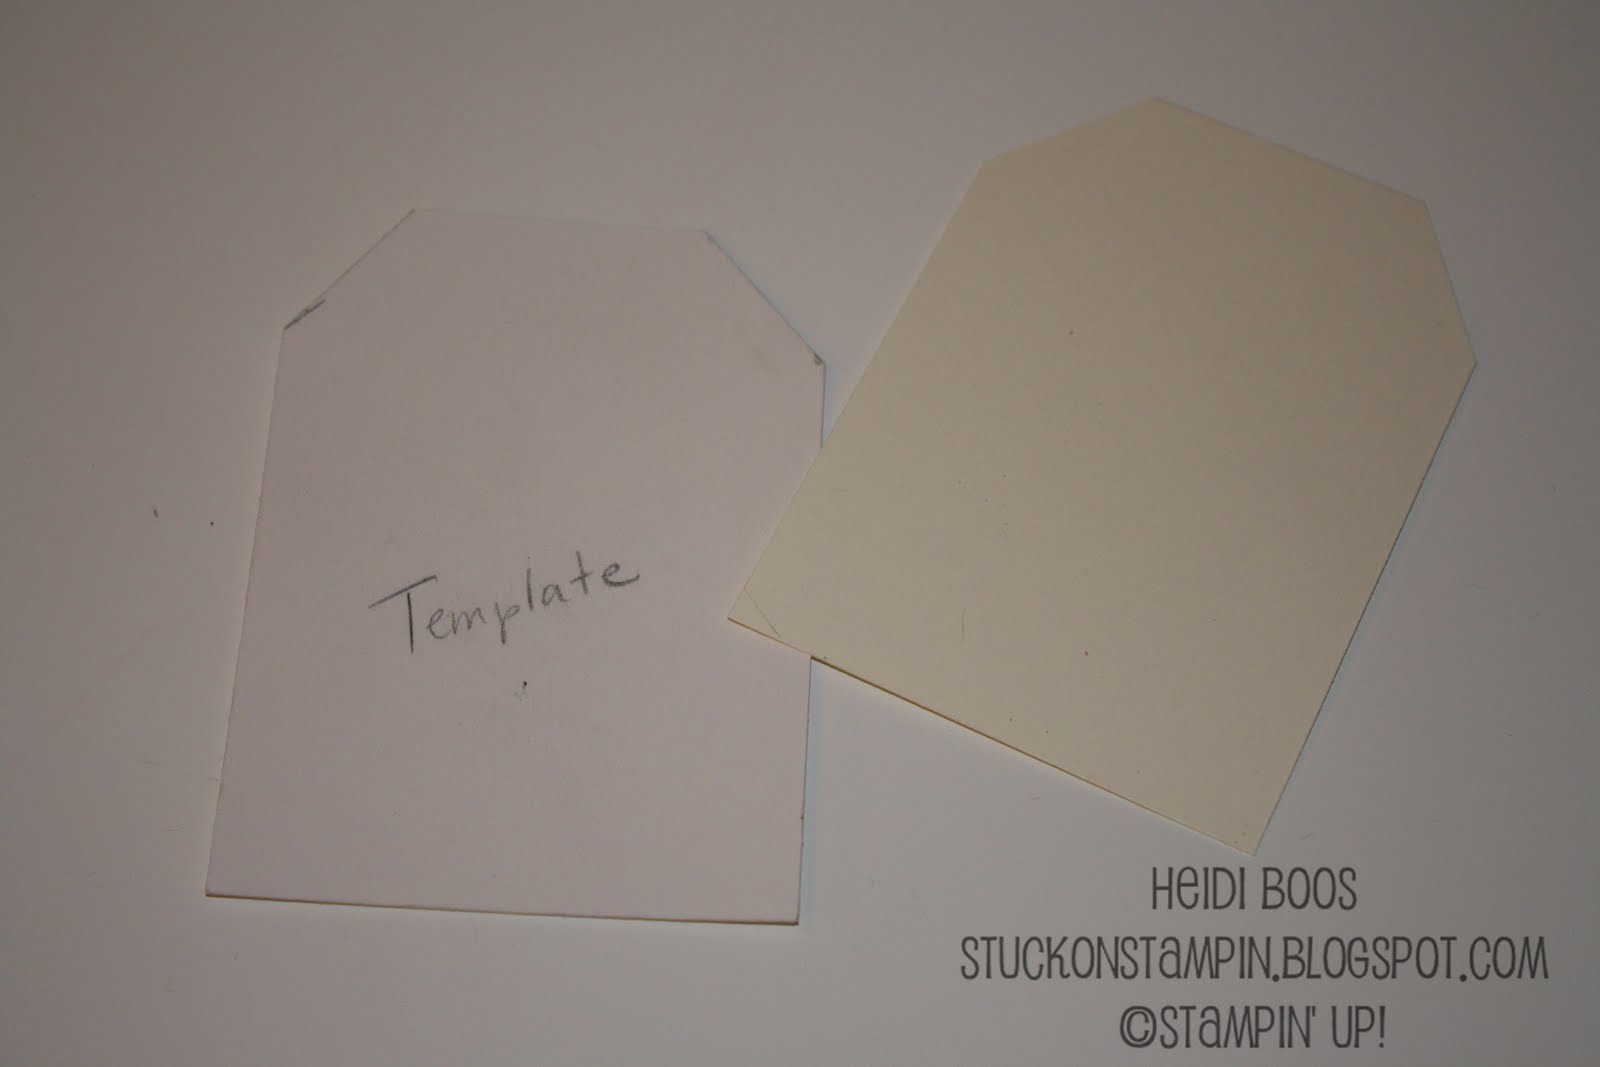
Because I made a handful of these for my Holiday Bazaar, I wanted to create a template that I could use to get the corners just right each time without having to guess. First I cut a piece of Very Vanilla cardstock 2-1/2" x 3-1/2" and snipped off the corners until I felt like they were even on both sides. Then I traced it onto a thin piece of cardboard to have as my template.
What you'll need:
- 2-1/2" x 3-1/2" piece of Very Vanilla cardstock (corners snipped as mentioned above)
- 3/4" x 2-1/2" piece of your favorite Christmas DSP
- 2 - Dotted Scallop Ribbon Border punched pieces of Real Red cardstock (2" long)
- 1/2" circle punched from Garden Green cardstock

With SNAIL adhesive, adhere one of the dotted scallop trims onto the bottom of the tag, letting half of it hang over the edge.

Trim off the part hanging over the edge...this will become your bottom border.

Using the other dotted scallop trim adhere half of it onto the back of the small piece of DSP using SNAIL adhesive.

Adhere this onto the top of the tag.

Turn the tag over and snip the corners.

With SNAIL adhesive, adhere the 1/2" circle to the middle of the top part of the tag.

Line up the 1/8" Circle punch over the green circle to create a hole for the ribbon to thread through.

Stamp your tag with the stamp set of your choice.
I used:
- Pennant Parade stamp set (Garden Green & Chocolate Chip)
- the small Real Red heart on the tree is the smallest heart of the Heart to Heart punch
- Sweet Season stamp set (colored with markers...Garden Green & Real Red)
- my ribbon choice: 1/8" Real Red Taffeta ribbon

I would love, love, love to see your creations using the skinny cellophane bags, so in your comment below, please leave me a link to yours, too!
{HAPPY STAMPING!}
I hope you stay to join me for the next 12 days as I share some fun Christmas projects with you. And, definitely come back on Day 12 for a GIVEAWAY!!
2 comments :
Very cute! I can't wait to see the rest of your projects. TFS
Cute tags! I just bought red and green M&Ms to fill my tubes, can't wait to make them.
Post a Comment